When installing a mini split air conditioning unit, one of the most critical aspects to consider is the drainage system. Proper drainage prevents water from pooling inside the unit, which can lead to leaks, mold growth, and even system failure.
This article will guide you through the process of running a drain pipe for mini split, ensuring efficient drainage and optimal system performance.
Table of Contents
Understanding the Role of Drainage in Mini Split Systems
Mini split systems, while efficient in cooling and heating homes, produce a byproduct: moisture. As the evaporator coil cools the air, it draws moisture from the air, condensing it into water. This water must be effectively expelled to prevent water damage and maintain the system’s efficiency.
A drain pipe is a crucial component that manages condensation by channeling the water away from the air handler and out of the building. By ensuring proper drain pipe installation and maintenance, homeowners can safeguard their mini split systems and enjoy optimal performance.
Key Components of a Mini Split Drainage System
A mini-split system relies on a well-designed drainage system to efficiently remove condensate water that forms within the indoor unit. This condensate is a byproduct of the cooling process, where warm, humid air is cooled and dehumidified.
A drain pan collects the condensate and directs it into a drain pipe. In most cases, gravity-based drainage is sufficient to expel the water outdoors. However, in certain installations, a condensate pump may be necessary to elevate the water to a suitable drainage point.
To prevent water backflow, a trap is installed in the drainage system. This crucial component ensures that the condensate water is properly directed away from the indoor unit.
Materials You’ll Need for Running a Drain Pipe
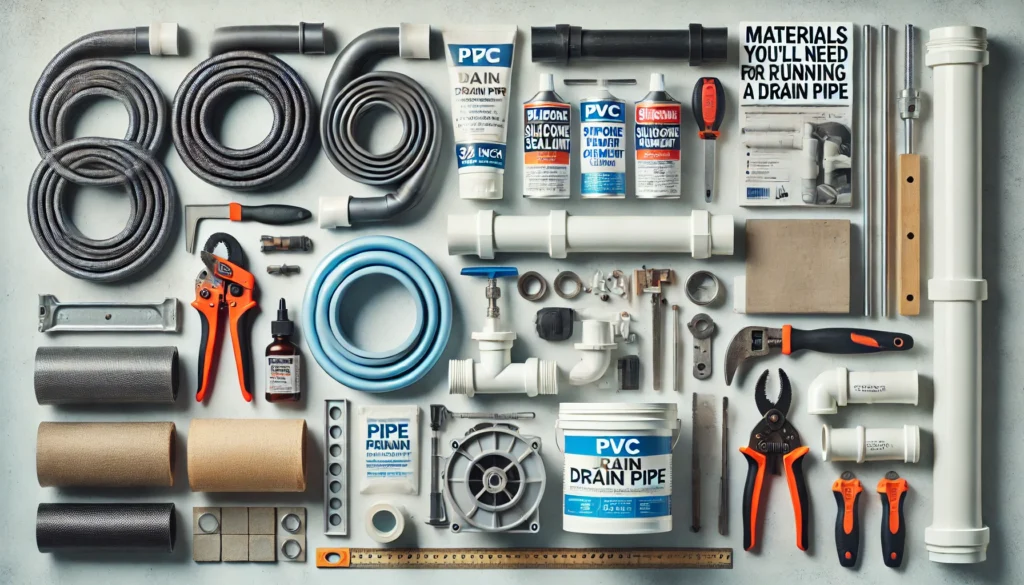
Before you start the installation, gather the following materials:
- PVC drain pipe (typically ¾ inch or 1 inch in diameter)
- PVC pipe cutter or saw
- Silicone sealant or PVC primer and cement
- Flexible drain hose (optional)
- Condensate pump (if needed)
- Pipe insulation (optional)
- Pipe hangers or brackets (for securing the pipe)

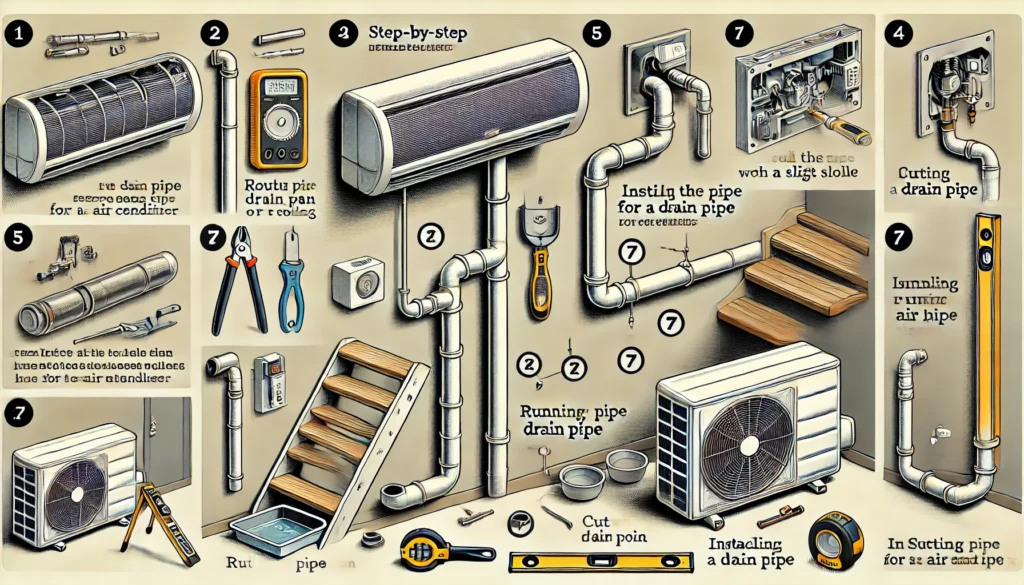
Step-by-Step Instructions for Running a Drain Pipe
Step 1. Plan the Drainage Route
Once the drainage path is determined, it’s time to install the drain pipe. The pipe should be routed along the wall or ceiling, avoiding any obstacles like studs, beams, or electrical wiring that could interfere with its path.
For wall-mounted units on higher floors, a gravity-based drainage system may not be feasible. In such cases, a condensate pump can be used to pump the condensate to a lower point where it can drain by gravity.
Step 2. Install the Drain Pan
Once the air handler is in place, it’s time to securely install the drain pan. This pan is essential to collect any water that might naturally accumulate within the unit.
To ensure proper water flow, position the pan with a slight slope towards the drain outlet. This inclination will help the water to flow smoothly through the drain pipe and out of the system.
Step 3. Cut the Drain Pipe to Size
Precisely measure the required length of the drain pipe using a tape measure. Mark the cut point with a marker. To ensure a clean and accurate cut, utilize a PVC pipe cutter or a fine-toothed saw.
Gently guide the tool along the marked line, applying steady pressure to achieve a straight, even cut. Avoid excessive force to prevent the pipe from cracking or splintering.
Step 4. Attach the Drain Pipe to the Air Handler
To ensure a watertight seal and prevent leaks, carefully attach the drain pipe to the air handler. Begin by applying PVC primer and cement to the threaded end of the drain pipe. Next, insert the pipe into the slip-fit outlet on the air handler.
To secure the connection, apply silicone sealant around the joint. Allow the silicone sealant to cure for the recommended time before proceeding to the next step.
Step 5. Route the Drain Pipe
Plan the pipe’s route from the unit to the drainage location. Ensure a continuous downward slope of at least ¼ inch per foot.
Secure the pipe to the wall or ceiling using hangers and brackets. Drill holes for the pipe and insulation. For tight spaces, a flexible hose is helpful.
Step 6. Install a Trap
A trap is crucial for any drainage system. This short, bent pipe forms an S or P shape, creating a water seal that stops air from entering and disrupting water flow.
To install the trap, position it below the air handler at a downward angle. PVC Traps are often used for their flexibility. U-shaped traps are popular for their balance of flexibility and water seal effectiveness.
Step 7. Attach the Drain Pipe to the Exit Point
Connect the drain pipe to the convenient exit point. Ensure a consistent downward slope for gravity drainage. Use a PVC coupling to seal the pipe to the wall for wall mounting. For pump-assisted discharge (like condensate pumps for mini splits), push the pipe into the pump’s inlet fitting.
Step 8. Insulate the Pipe (Optional)
Insulating your drain pipe is a good idea if it runs through an area with significant temperature fluctuation, like an attic or unconditioned basement. Insulation prevents condensation and moisture buildup, reducing the risk of mold growth. You can use foam insulation or pre-made pipe sleeves to insulate your pipe.
Step 9. Test the System
Thoroughly test the mini-split system in cooling mode for several hours to ensure proper drainage. Check all connections for leaks. Run the condensate pump to test if it activates when needed. Check if water flows smoothly through the pipe and exits without obstruction.
Step 10. Finalize the Installation
Secure the pipe firmly using brackets and hangers. Ensure the pipe is securely fastened to the wall to prevent any loose sections. Once the pipe exits the wall, seal the hole to prevent drafts, water entry, and pest infiltration. Test the system to finalize the installation and ensure everything passes.

Common Drainage Problems and Troubleshooting Tips
Clogged Drain Pipe is a common issue that can lead to water backup, leaks, and mold growth. To prevent this, clean the drain pipe regularly with a mixture of vinegar and water. Additionally, ensure the condensate pump is serviced periodically to maintain optimal performance.
Leaking Connections and Seals can also cause significant problems. Check all connections and seals for damage or wear. If necessary, apply a high-quality sealant to ensure a tight fit.
To avoid the siphoning effect, ensure the drain pipe is properly sloped. This will allow water to flow smoothly away from the air handler.
Check Similar Guide: Why Are My Drains Gurgling? A Comprehensive Guide!
Conclusion
Proper drainage is a crucial aspect of maintaining the efficient operation of your mini split system. Condensate water is a byproduct of the cooling process, and it must be removed to prevent long-term damage to your home and system. This straightforward process can be easily accomplished by following a few steps.
A well-installed drain pipe will effectively transport the condensate water away from your mini split unit and out of your home. By adhering to this guide, you can ensure that your mini split system continues to run smoothly and efficiently for years to come.
Frequently asked Questions
What is the purpose of a drain pipe in a mini split system?
The drain pipe in a mini split system is responsible for carrying away the condensate water produced by the evaporator coil. Without proper drainage, water can accumulate inside the unit, leading to potential damage, mold growth, and decreased efficiency.
How do I choose the right size drain pipe for my mini split?
Most mini splits use a ¾-inch or 1-inch diameter PVC drain pipe. It’s essential to choose the correct size to avoid clogs and ensure efficient drainage. Check your mini split’s manual for specific recommendations.
Can I use a flexible hose instead of a rigid drain pipe?
Yes, a flexible hose can be used for the drain pipe. However, rigid PVC pipe is often more durable and less prone to kinking. Make sure the hose is appropriately sized and securely attached to avoid leaks.
How do I ensure proper drainage for my mini split?
To ensure proper drainage, make sure the drain pipe slopes downward away from the unit. A gentle slope of 1/4-inch per foot is typically recommended. This allows gravity to do the work and helps prevent clogs or water buildup.
What should I do if my mini split drain pipe is clogged?
If your drain pipe is clogged, you can try using a wet/dry vacuum to clear the blockage. Alternatively, use a pipe cleaner or a long brush to dislodge the clog. If the problem persists, it may be necessary to replace the pipe.
Can I install a drain pipe myself?
Yes, if you’re comfortable with basic plumbing tasks, installing a drain pipe for your mini split is relatively simple. However, if you’re unsure or uncomfortable with DIY work, it’s best to hire a professional HVAC technician to ensure proper installation.
Do I need a trap in my mini split drain pipe?
Yes, a trap is necessary to prevent air from being drawn into the drainage system. This helps maintain the correct pressure in the system and ensures proper water flow. The trap should be installed in the horizontal portion of the drain line.
How can I prevent mold growth in the drain pipe?
To prevent mold growth, ensure the drain pipe is kept clean and free of debris. Regularly inspect the pipe for signs of leaks or blockages, and clean it with a mixture of water and vinegar or mild bleach to kill any mold or bacteria.
Is it necessary to insulate the drain pipe?
Insulating the drain pipe is not always necessary, but it can help prevent condensation on the outside of the pipe, especially in areas with high humidity or temperature fluctuations. Insulation also helps maintain the system’s efficiency.
How do I connect the drain pipe to the mini split unit?
To connect the drain pipe to the mini split, attach one end of the pipe to the drain port located on the air handler. Use PVC primer and cement or silicone sealant to create a watertight seal between the pipe and the drain port.
What happens if the drain pipe is not installed properly?
Improper installation of the drain pipe can lead to water pooling inside the unit, which can cause mold, corrosion, or water damage to the ceiling or wall. It may also result in the system not performing optimally, reducing its efficiency.
Should I use a condensate pump for the drain pipe?
If your mini split is located in an area where gravity-based drainage is not possible (e.g., in a basement), a condensate pump can help move the water to an appropriate drainage location. This is particularly useful for installations with high ceilings or complex routing.
How do I maintain the mini split drain pipe?
To maintain the drain pipe, inspect it regularly for any signs of clogs or leaks. Clean the pipe at least once a year using a pipe cleaner, vacuum, or a cleaning solution designed for air conditioning systems. This helps prevent buildup and ensures smooth water flow.
What should I do if water starts dripping from the mini split unit?
If water starts dripping from the mini split unit, it could indicate a clogged or disconnected drain pipe. Check the pipe for blockages, and ensure it is securely attached. If the issue persists, you may need to call a professional technician for further inspection.


